
How to setup a GitHub Pages static site with custom domain?

Publishing a site on GitHub Pages
You may want to host your static website for free, and GitHub Pages is a great platform to do so. In this tutorial, I am going to show you how you can setup your own GitHub Pages site with your custom domain name!
Prerequisites
→ You need to have git installed on your computer. Click here to download and setup git on your computer.
After that’s done, create a static site where the landing page is named as index.html. The reason you need to name your landing page, or the first page a user would see as index.html is that the web server by-default looks for the index.html file when no other file is specified.
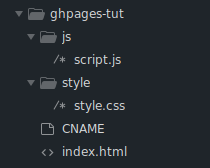
I have created a sample static site with a single HTML page called index.html, one JavaScript file and one CSS file. The directory structure followed is as the following image -
You can find the code for this static site here. We will take a look at the CNAME file later on when we will configure the custom domain for this GitHub pages site.
Now, let’s create a new repository on GitHub. I have created one for the same here. Open up a terminal window in your directory, and initialize a git repository by using the following command.
$ git init
Note: You do not need to use this command if your directory is already a GIT repository.
Now add a remote origin to your repository by using the following command-
$ git remote add origin <your-repository-url>
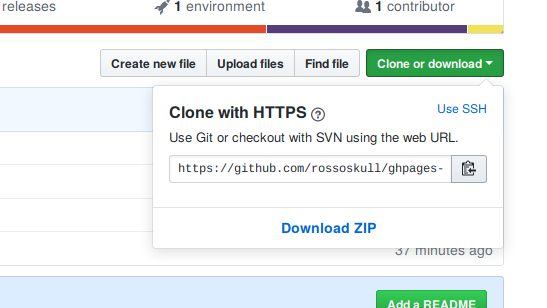
You can get your repository URL by visiting your repository page, and in the drop down menu of “Clone or Download”, as shown in following image.
Execute the following commands to stage your changes, and commit the changes-
$ git add .
$ git commit -m "<Your commit message>"
Push your commits to the master branch of your GitHub repository by executing the following commands-
$ git push origin master
Now open your GitHub repository page, open the settings tab, and scroll down to the section which says ‘GitHub Pages’.
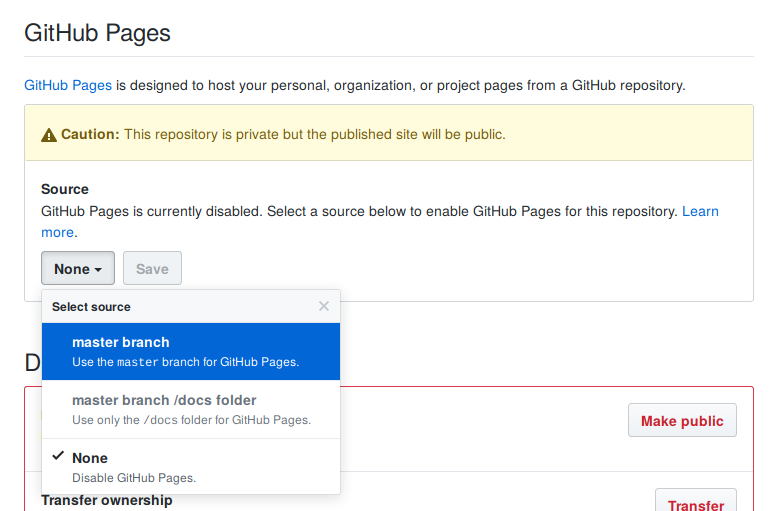
There is a drop down menu, which lets you configure the GitHub pages settings for the respective repository. There are three options:
- master branch
- master branch \docs folder
- None
Initially, the ‘None’ option is selected. It means that the current repository is not being used for GitHub Pages publishing. The ‘master branch’ option should be selected when you place your index.html file in the root directory of your GIT repository. And the ‘master branch \docs folder’ option is used when you place your index.html file in a ‘docs’ directory in the root directory of your GIT repository. For this tutorial, we are placing the index.html file in the root directory of our repository. So we will select the ‘master branch’ option and save the changes. After we save the changes, our repository will be used for GitHub Pages publishing, and the site will be live at https://<username>.GitHub.io/<repository_name>.
It may take some time to update the DNS, but your site will be published. But even after some time, if the site is not published, you can try making some changes to your site, and pushing your commits to the GitHub Repository, which will trigger the republish, and your site will get published.
Adding a custom domain
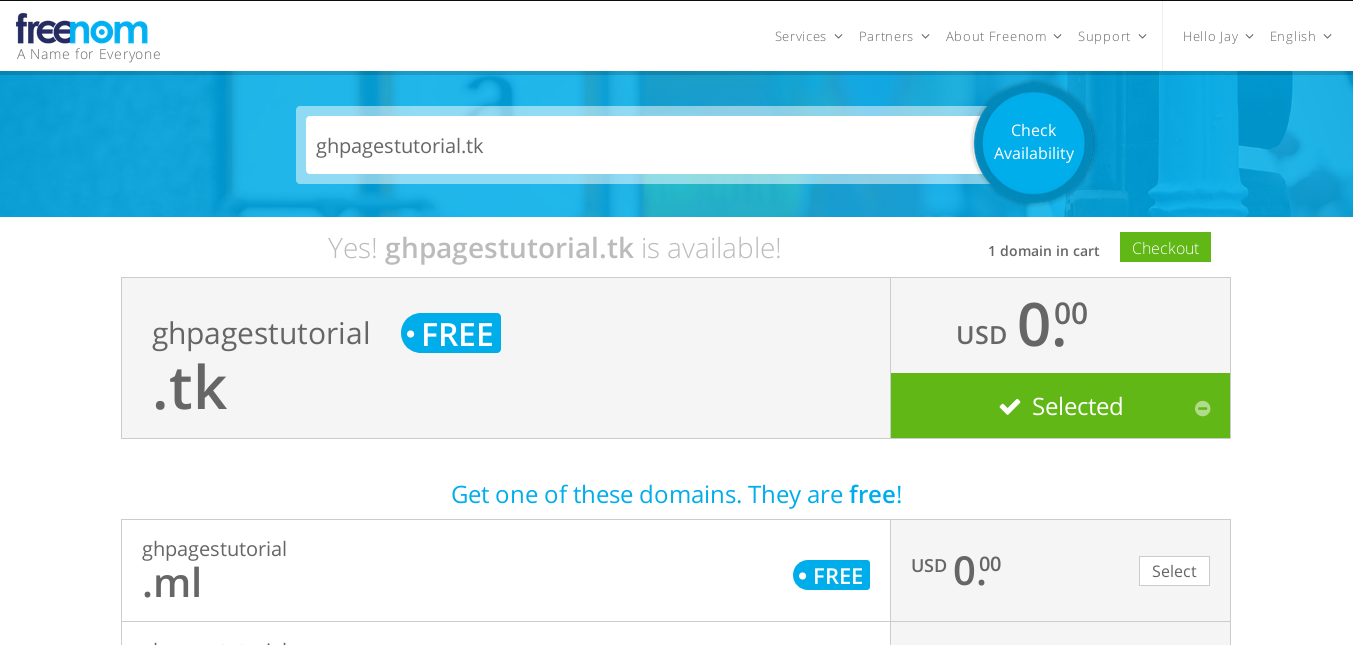
Now we will see how you can add a custom domain to your GitHub Pages site. If you don’t have a domain already, you can get one for free from Freenom. I will be using a free domain from Freenom in this tutorial. After you select your domain-
click on the checkout button. It will take you to the following page-
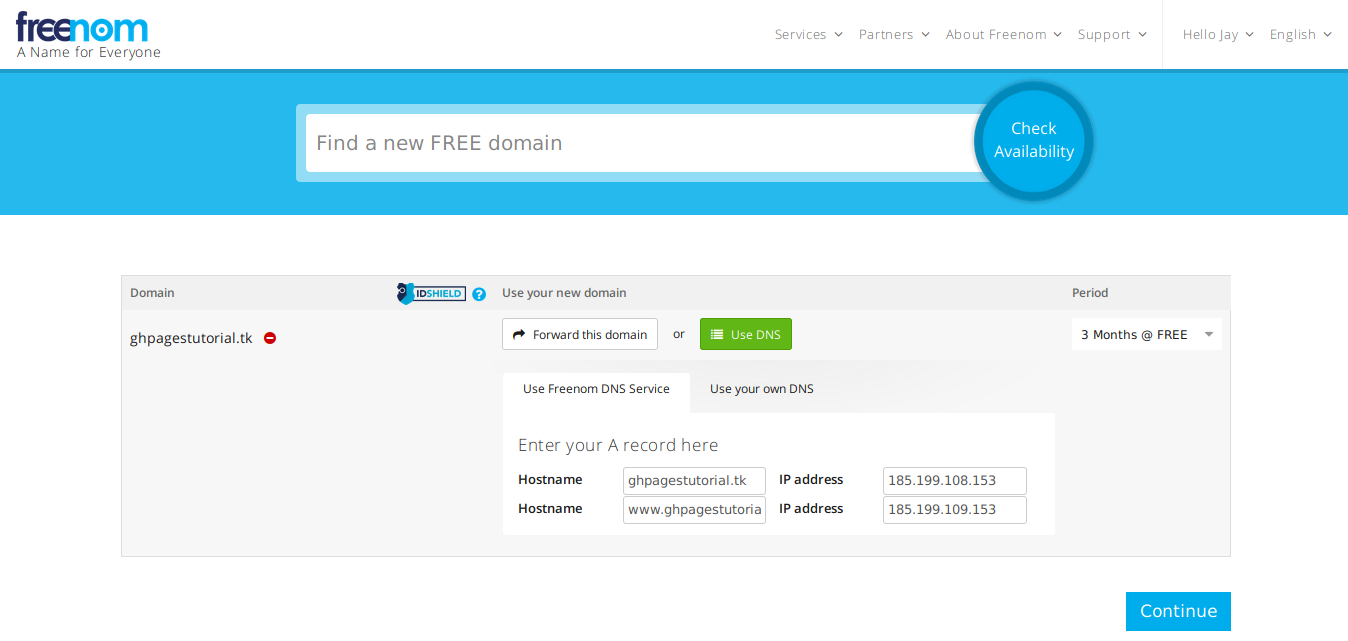
Click on the ‘Use DNS’ option and it will open up a form where you can edit the A records. You have to enter the IP addresses of GitHub Pages’ DNS servers. You can find the DNS IP’s of GitHub Pages here. Select any two IP addresses and paste them in the form of the checkout page. Click continue after it’s done.
This is where the CNAME file comes into action. To add a custom domain to your GitHub Pages site, create a file named CNAME in the root directory of your GitHub repository and insert the domain name in the file. In my case, I had to use ghpagestutorial.tk. If you would like to use any subdomain, you can add it in the CNAME file in a new line. Now stage this changes and commit them, and push the changes to the master branch of your GitHub repository by executing the following commands-
$ git add .
$ git commit -m "<commit-message>"
$ git push origin master
The changes may take some time to get reflected, but you will be able to visit your static site at your domain now.
If you face any errors or problems, and don’t know how to solve them, you can leave a comment below, and I will get back to you.
That’s it for today people, thank you for your time!
Adios Folks!